The Integrated terminal in VS Code can be your one and only terminal - if you wish it!
The VS Code integrated terminal can be used to enter commands, access files and directories, and create and open files to be programmed in the editor window. This post shows how to work with and configure the integrated terminal.
However, the integrated terminal will function in essentially the same way on Windows and macOS.
Basic Usage
To open the terminal (or unhide it) simply press Ctrl + `. (That's the backtick symbol.) Once opened, you can work with it like any other terminal. Issue commands as you normally would and run code from your editor window at will. See the figure below for an example.
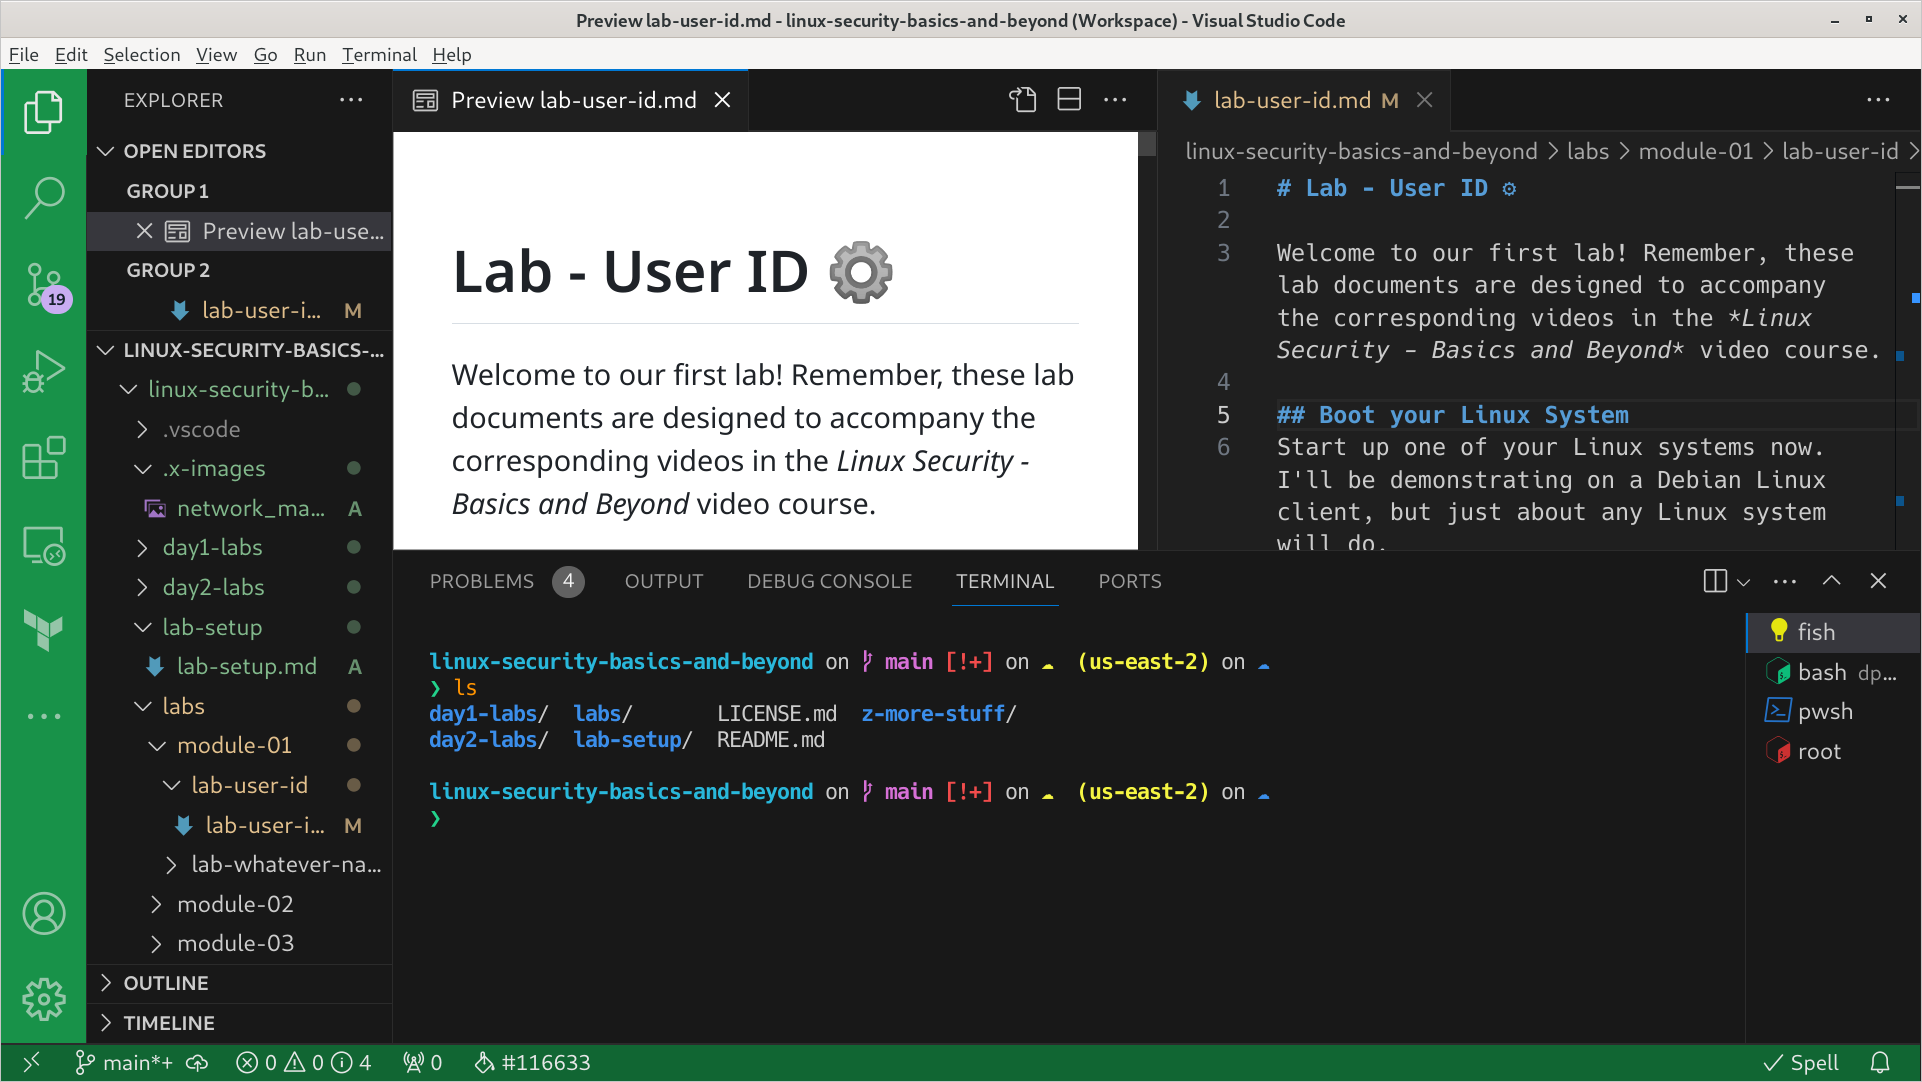
You can adjust the size of the terminal window by clicking and dragging on the border of the window. The integrated terminal is displayed in the same window area as: Problems, Output, Debug Console, and Ports.
To hide the terminal window, once again press Ctrl + ` . That is the toggle for the integrated terminal. Once you do, your working area will automatically become the code editor window.
To actually close a terminal, type exit or press Ctrl + d as you normally would with any other terminal. If need be, you could assign a custom keyboard shortcut to "terminate the terminal". It's workbench.action.terminal.kill.
There you go—the terminal is easy to use. Let's discuss more about how you can use it in VS Code.
Creating Additional Terminals
You might need additional terminals for a variety of reasons: quick access to different directories; access to different shells; automating terminal actions; and so forth. No problem. To make a new terminal do one of the following:
- Press
Ctrl + Shift+ `on the keyboard. - Go to: Menu bar > Terminal > New Terminal.
- Click the
+sign above the list of working terminals. (This will build a terminal from your default profile.) - Click the down arrow next to the
+sign to launch a profile. (From here you can select the profile for the terminal to use.)
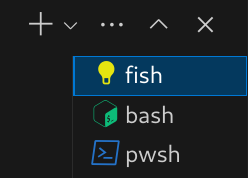
The last option is where you can choose different shells—if you have them installed. As a sysadmin/devops type person, I need access to Bash and PowerShell, plus I use Fish as my main shell. But you may find that you need other shells such as zsh and sh, multiplexers such as tmux, or debuggers such as the JavaScript Debugger Terminal. If you don't have them, they can be added, as we will demonstrate later.
Once you have additional terminals, you can switch between them by pressing the Ctrl + Pageup and Ctrl + Pagedn shortcuts.
While I use other IDEs and other terminals, the VS Code integrated terminal can handle a lot of what I throw at it. It is very handy if I am working on a developing project or if I am building labs. I'm constantly using it. It makes VS Code quite indispensable.
To quote a good tech friend of mine (when asked about using other IDEs such as Fleet): "You'll have to pry VS Code out of my cold, dead hands!" Pretty graphic, but the sentiment is understood.
Splitting the Terminal
Sometimes you want to do some side-by-side work in two terminals. That would require a split.
Splitting a terminal in VS Code is easy. Do one of the following:
- Press
Ctrl + Shift + 5on the keyboard - Go to: Menu bar > Terminal > Split Terminal
- Click the Split button next to the terminal list in the terminal panel. (if your terminal list column is wide enough)
- Click the Launch Profile drop-down arrow, go to Split Terminal, and select the shell type you want.
Any one of those will split the current terminal in two.
You can split the terminal as many times as you want, but more than one split might be difficult to work with. Plus, as of the writing of this post, VS Code only allows for one-dimensional splitting—meaning vertically or horizontally—depending on the positioning of your terminal.

As you can see in the figure, the current working terminal is vertically split. The left side is running the "top" program, and the right side is listing the contents of the working directory. A split terminal is displayed in the right pane with a tabbed connector as shown in Figure 2 where it says "split".
You can switch between split terminals by using the Alt + arrow keys. In this case I need the left and right arrows. But if you have the entire terminal displayed to the right, and the split is occurring horizontally, then you would need to use the up and down arrows. When used with Alt this can make the program think that you want to enable the menu bar in VS Code. That can be annoying, so a custom shortcut could be created like this:
- Go to Keyboard Shortcuts
- File > Preferences > Keyboard Shortcuts
- or, use the chord
Ctrl + KandCtrl + s
- Type
workbench.action.terminal.focusNextPane. - Click the edit icon and press the keyboard shortcut combination you would like to use.
That can be done for workbench.action.terminal.focusPreviousPane as well.
Now you can use your custom shortcuts to navigate between the split terminals. Just make sure that they don't interfere with any other operations within your computer!
Maximizing the Terminal
You can "maximize" the terminal so that it inhabits the terminal and code editor window areas. There are a couple of ways to do this:
- Click the "Maximize Panel Size" up arrow above the list of terminals.
- Create a custom shortcut.
The shortcut is my favorite method. I try to stay away from the mouse as much as possible. (Not because of my fear of mice, but because of the perceived gain in efficiency.) As of the writing of this post, to create a keyboard shortcut, you will need to access one of the workbench settings. At some point, I could see the developers of VS Code adding a standard shortcut for this, but for now, one does not exist.
- Go to Keyboard Shortcuts
- File > Preferences > Keyboard Shortcuts
- or, use the chord
Ctrl + KandCtrl + s
- Type
workbench.action.toggleMaximizedPanel - Click the edit icon and press the keyboard shortcut combination you would like to use.
That should save the shortcut for the current user. Once done, that shortcut will act as a toggle to maximize the panel and restore it back to its original location. Try using it to maximize and restore the terminal. Quite awesome.
Ctrl + Shift + Q but that is a fairly strange one. I have so many keyboard shortcuts that I am running out of options! Also, it is dangerously close to Ctrl + W which will close your current editor window. So choose wisely!This feature also works in Zen mode (Ctrl + K Z) where it will effectively run the terminal in full screen for additional space. Tmux works well in this mode. (With tmux, you can also split in the second dimension.) See the figure below for an example.
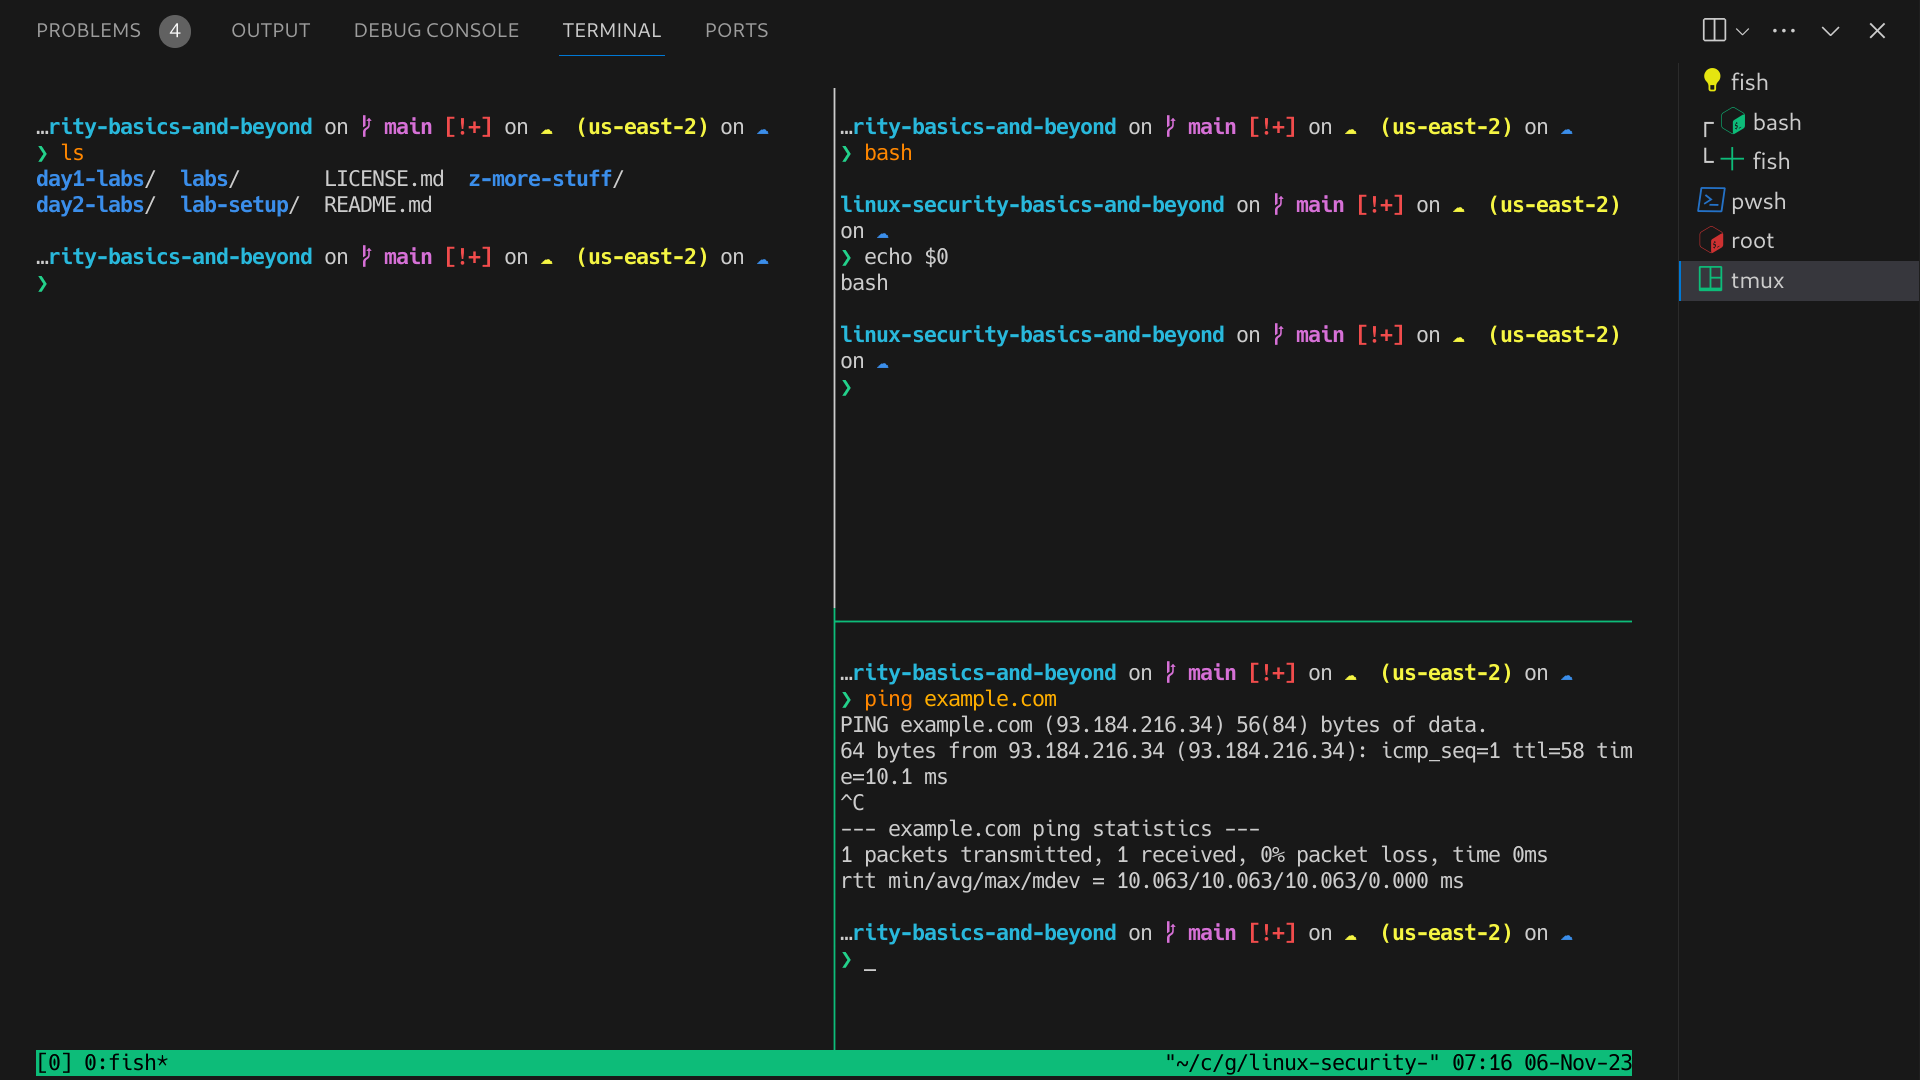
Ctrl + K Z again or press Esc twice while in an editor window. For more about Zen mode see my VS Code Basics article.

🔥 Check out my video courses! 🔥
Working with Profiles
If you don't have access to the shell that is required, you might need to install the shell to the operating system and create a profile to it. For example, on a Windows system you will have PowerShell by default.
However, I highly recommend running a Bash shell also—a full WSL instance or GitBash for example. (Everyone should be running Bash in one form or another!)
macOS uses the zsh shell by default (as of the writing of this article). On a Linux system, aside from Bash, I recommend Fish or Zsh, as they can help your workflow tremendously.
On a Linux system, aside from Bash, I recommend Fish or Zsh, as they can help your workflow tremendously. Once installed, they will integrate with VS Code after a restart.
As mentioned, you can list the profiles available to you by clicking the drop down arrow above the list of currently open terminals. This allows you to select whatever shell you like. Normally, if the shell is installed, VS Code will see it and allow you to easily build a terminal based on it. However, in some cases, you will need to create a new profile. This will require that you can work in JSON.
To create a new profile go to the settings.json file.
- Open the Command Palette (
F1orCtrl + Shift + P) - Type
open user settings JSONand select the option that says "Preferences: Open User Settings (JSON)". - Look for the section that says
"terminal.integrated.profiles.<OS_type>"
You can add your own profiles if you wish.
For example, PowerShell in Windows:
 "terminal.integrated.profiles.windows": {
    "PowerShell -NoProfile": {
      "source": "PowerShell",
      "args": ["-NoProfile"]
    }
  }
Or, to add zsh in Linux:
"terminal.integrated.profiles.linux": {
    "zsh (login)": {
      "path": "zsh",
      "args": ["-l"]
    }
  }
You can add other attributes such as "icon" and "color" to modify the look of the icon. For example:
"icon": "terminal-bash",
"color": "terminal.ansiRed"Here's an example of integrated profiles in settings.json on one of my Linux systems:
"terminal.integrated.profiles.linux": {
        "bash": {
            "path": "bash",
            "icon": "terminal-bash",
            "color": "terminal.ansiYellow"
        },
        "bash-root": {
            "path": "bash",
            "icon": "terminal-bash",
            "color": "terminal.ansiRed"
        },
        "zsh": {
            "path": "zsh",
            "icon": "zap",
            "color": "terminal.ansiCyan"
        },
        "fish": {
            "path": "fish",
            "icon": "light-bulb"

        },
        "tmux": {
            "path": "tmux",
            "icon": "terminal-tmux"
        },
        "pwsh": {
            "path": "pwsh",
            "icon": "terminal-powershell",
            "color": "terminal.ansiBlue"
        }
    },
If you need to change your default profile, you can do it in Settings, or here in settings.json by modifying the following:
"terminal.integrated.defaultProfile.linux": "fish",
Set it to whatever profile you wish, and any terminal that is created will default to that profile and shell.
As we mentioned, newly installed shells will usually be available to you automatically in VS Code. However, this is the place to go if you want to configure how those shells operate and how they are presented by VS Code. Excellent ^
To do so, press
Ctrl + Shift + C. Note that this only works if the current terminal is hidden. When you do so, VS Code will signal the operating system to open the default terminal outside of VS Code. However, it places you in the current VS Code working directory. Terminal Fonts
Let's get a little more nerdy. You can modify the font type and size within Settings or within settings.json. Here's how:
- In Settings
- Press
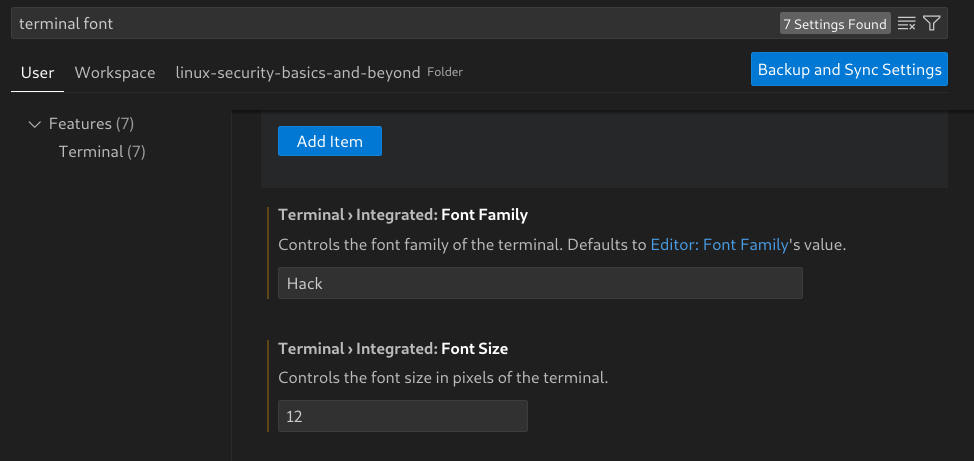
Ctrl + ,to open Settings. - Search for "terminal font". That should bring you to Features > Terminal (as shown in the figure below). Then you can scroll down for the option you need:
- Terminal > Integrated: Font Family
- Terminal > Integrated: Font Size
- Press
- In settings.json
- Press F1
- Search for "user json settings" and click "Preferences: Open User Settings (JSON)".
- Locate the following:
"terminal.integrated.fontFamily": "Hack",Or, if you want the terminal font to default to the editor font, locate this:
"editor.fontFamily": "'Hack', 'Droid Sans Mono', 'monospace', monospace",Modify these as you will. Consider a NerdFont for easy reading in the Terminal such as Hack, FiraCode, or Source Code Pro.
Saving Multiple Terminals
Now it gets tricky. Take a look at the figure below. It shows the list of terminal profiles that I am using in VS Code.
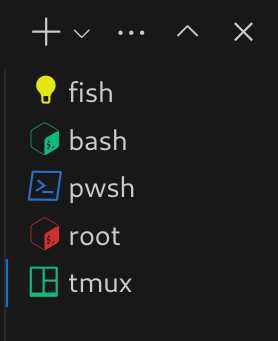
What if I want to keep re-using these persistently? This is where we can run into some trouble. If you save your workspace and are only running one VS Code window, then these terminals should open back up automatically the next time you open the project–"should" being the keyword here. However, if you work in multiple VS Code windows simultaneously (as many of us do), then VS Code can easily get confused and you can lose your additional terminals, especially after closing VS Code, or rebooting the system.
So what to do? First of all, there is no perfect solution (at least that I have found as of yet). But here are some options:
- ⭐ Use tmux. This is my #1 solution. That's because it saves its profile outside of VS Code. In fact, you could use the profile in any old terminal anywhere on your system. tmux is all you need!
To use tmux in this manner, do the following:- Start a default terminal (Bash for example).
- Create a new tmux session:
tmux new -s <session_name> - Configure your splits, windows, shell types for each terminal, and so on.
- Whenever you re-open VS Code, open a default terminal and access the session:
tmux a -t <session_name>. Your terminal session should pop up immediately–exactly as you left it. Done.
While tmux is my #1 solution for saving lots of terminals, it doesn't actually solve the problem of saving multiple terminals that use different profiles in VS Code.
Some other options include custom extensions, setting persistent sessions to "true", and using tasks. Let's discuss those a bit further:
- Use an Extension:
- Terminals Manager (my favorite). To use this, install the extension, build a terminals.json file, and run it (
F1and "Terminals: Run"). If for some reason they are lost the next time a project is opened, simply run the command again, and they are back. You can also select your path and add commands to the JSON file. Very handy! Below you will find an example terminals.json file that runs on one of my Linux systems:
- Terminals Manager (my favorite). To use this, install the extension, build a terminals.json file, and run it (
{
  "autorun": false,
  "terminals": [
    {
      "name": "Fish",
      "shellPath": "/bin/fish",
      "icon": "terminal-debian",
      "color": "terminal.ansiRed",
      "focus": true
    },
    {
      "name": "BASH",
      "shellPath": "/bin/bash",
      "description": "A wonderful yellow Bash terminal",
      "icon": "terminal-bash",
      "color": "terminal.ansiYellow",
      "focus": true,
      "command": "echo \"Hello World\""
    },
    {
      "name": "ZSH",
      "shellPath": "/bin/zsh",
      "icon": "zap",
      "color": "terminal.ansiCyan",
      "focus": true
    },
    {
      "name": "pwsh",
      "shellPath": "/bin/pwsh",
      "icon": "terminal-powershell",
      "color": "terminal.ansiBlue",
      "focus": true
    },
    {
      "name": "tmux",
      "shellPath": "tmux",
      "icon": "terminal-tmux",
      "color": "terminal.ansiMagenta",
      "focus": true
    }
  ]
}- Restore Terminals — This extension is also good, but as of the writing of this article, Terminals Manager is better maintained.
- Make sure that terminals are set to save persistently. This is the default option in VS Code, but who knows, perhaps it was modified in some way. (Careful with this, it could have unexpected results.) Add this to your settings.json:
"terminal.integrated.enablePersistentSessions": true, - Use Tasks. This can work, but a warning—it requires some doing and if not done right can use a lot of resources on your system:
- Create a tasks.json file in your project. (Best done in your .vscode directory)
- Configure it to run the terminals that you want. I'm providing an example below. For more about automating tasks, click here.
- Note: If you do decide to use Tasks, or an extension, you may have to set the previous persistent configuration to "false". Otherwise, you might end up with conflicts or perhaps lots of terminals!
{
    "tasks": [
        {
            "type": "shell",
            "label": "BASH!",
            "command": "/bin/bash",
            "args": [
                "-l"
            ],
            "icon": {
                "color": "terminal.ansiBlue",
                "id": "beaker"
            },
            "isBackground": false,
            "presentation": {
                "echo": true,
                "reveal": "always",
                "focus": true,
                "panel": "dedicated",
                "showReuseMessage": true,
                "clear": true
            },
            "problemMatcher": [],
            "group": {
                "kind": "build",
                "isDefault": true
            }
        }
    ]
}
Example of using "Tasks" to launch a terminal. Press Ctrl + Shift + B to run the task.
Tasks is designed to automatically execute things in the integrated terminal(s). So for example, if you have scripts that need to run, or programs to be tested, Tasks is the way to go. It might not be the best option for simply "opening" blank terminals, but it has potential.
Summary
In this deep-dive post, we showed the basics of the VS Code integrated terminal: how to open it, hide it, and terminate it. We demonstrated how to add more terminals beyond the default. Then we showed how to split the terminal as well as maximize it. We also demonstrated how to build new profiles, work with terminal fonts, and how to save multiple terminals.

Check out my live webinars! I'd love to see you there!